Total: Dhs. 0.00
Taxes and shipping calculated at checkout


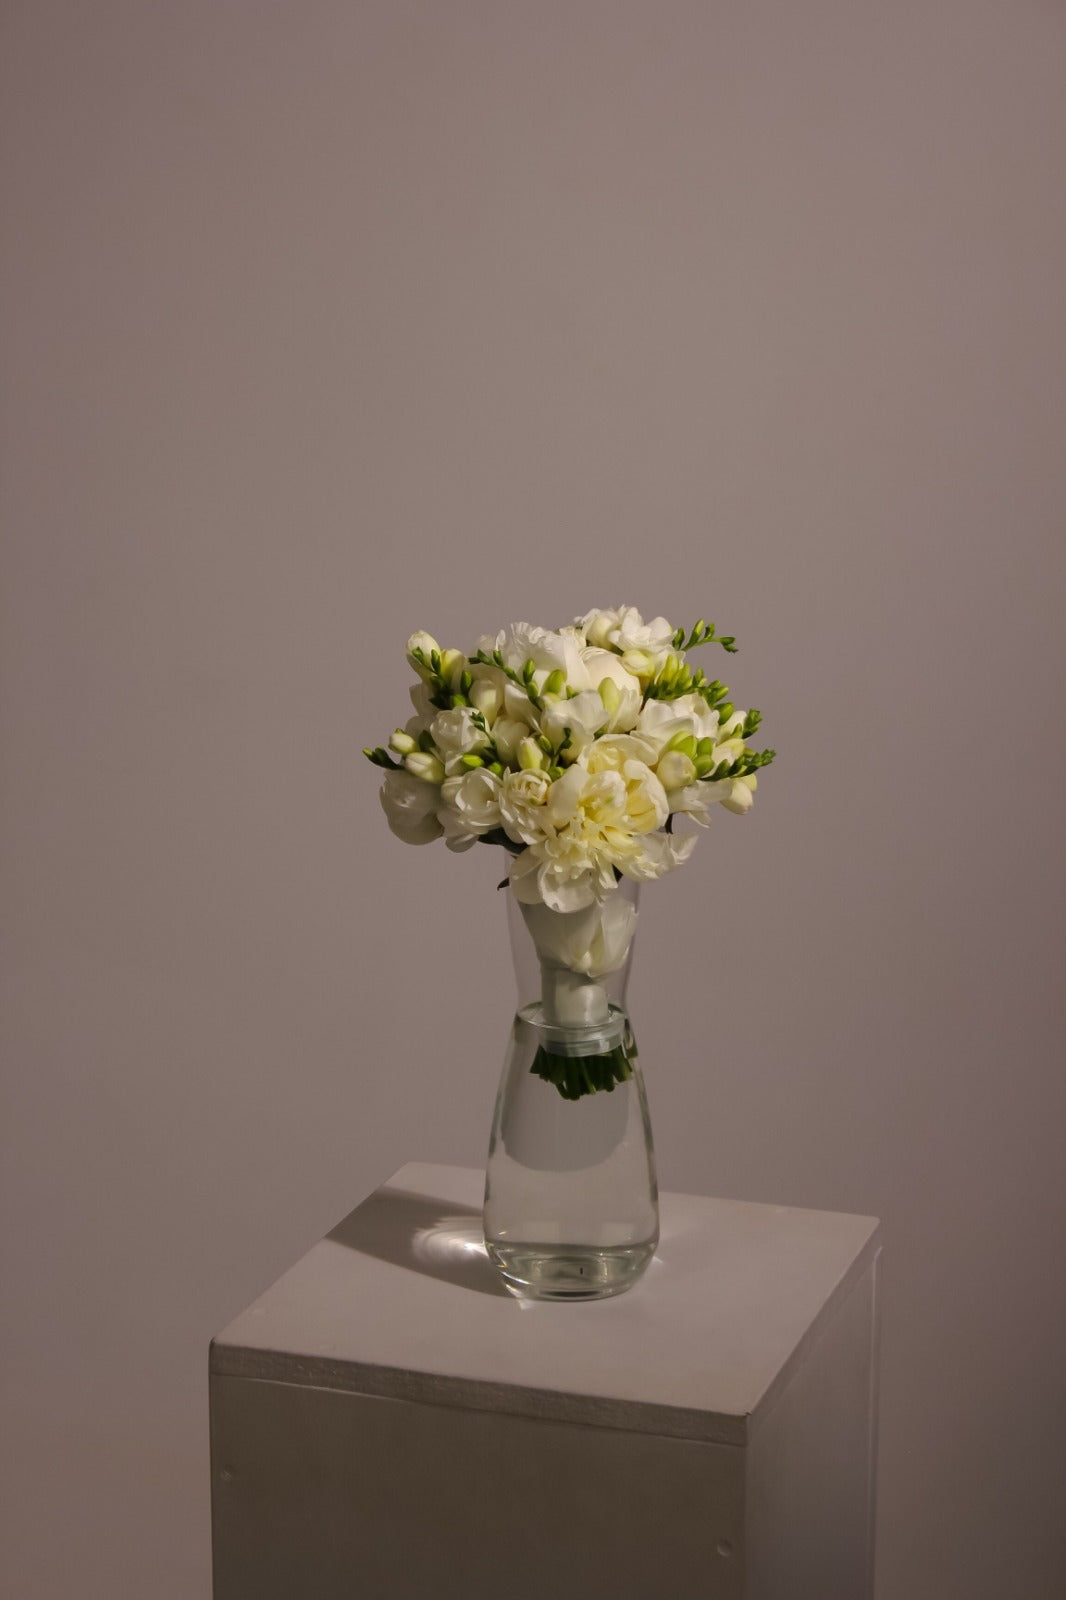
You do not need a florist’s workbench to arrange a vase of flowers at home. You need a stable vessel, clean water, a few stems with different shapes and a simple order of work. Start with the outline, position the most noticeable blooms, then fill the gaps with restraint. Step back often: an arrangement that looks crowded while you hold it may look balanced when viewed from across the room.
This guide explains how to arrange fresh flowers in a vase from start to finish. It works with a mixed bunch from a florist or a wrapped bouquet you would like to restyle. The aim is to help the flowers sit securely and look natural from the angles that matter in your space. There is no requirement to copy an exact photograph or use a fixed number of stems.
Think about the destination before you cut. A dining-table arrangement should allow conversation across the table. A hallway display can be taller and more dramatic. A desk vase needs a smaller footprint. Once you know where it will go, the remaining choices become easier.
Gather the flowers, a clean vase, fresh water, sharp floral snips or scissors, and a small surface for removed leaves and stems. A towel is helpful under the vase. If your flowers came with flower food, keep the packet and follow its mixing instructions. You may also want a second small vase for spare stems rather than forcing every flower into the main arrangement.
A balanced beginner mix can include three roles:
Focal flowers: The larger or more striking blooms that catch your eye first, such as roses, gerberas or a showy seasonal flower.
Supporting flowers: Bring smaller shapes or clusters around the focal blooms.
Greenery or airy filler: Creates an outline, fills selected spaces and connects the blooms.
These are design jobs rather than strict botanical categories: a spray rose can act as a focal flower in a tiny vase and a supporting flower in a larger one.
Start with fewer stems than you think you need. An open arrangement can show off flower shapes and lasts more comfortably in a vase than a tightly compressed bunch. You can add a spare stem later. Removing and trimming repeatedly is more difficult once flowers have been packed into place.
Consider height, opening width and stability together. A tall, narrow vessel supports longer stems but can crowd a generous bouquet. A very wide opening gives you room to spread flowers, yet a small number of stems may fall outward. A medium opening that lets stems cross naturally is forgiving for beginners. A heavier base helps when the flowers are tall or lean to one side.
As a starting point, imagine the visible flowers extending roughly one to one and a half times the height of the vase. This is a visual guide, not a rule: a low bowl calls for a different shape from a tall cylinder. Hold a few uncut stems beside the vase to see the likely silhouette. If the arrangement will sit at eye level, consider what it looks like from the front; on a dining table, check several sides.
Wash a reused vase with dish soap and rinse it thoroughly. The water should be clean before any stems enter it. Put enough water in the vase to reach every stem you intend to use, while leaving room to avoid splashing when the flowers go in. If you have flower food, mix it at the dilution shown on the packet. More than directed does not improve the result.
Lay the stems on a clean surface and sort them loosely into focal flowers, supporting flowers and greenery. Notice which blooms are fully open, which are in bud and which stems curve naturally. Put damaged or spent material aside. Do not assume a closed bud is defective; some flowers are delivered with room to open over time.
Turn each stem in your hand. A slight bend can make it especially useful at the edge of an arrangement, while a straight stem may suit the middle. See which side of a flower faces outward naturally. This minute of observation prevents you from fighting the flowers after they are in the vase.
Remove leaves that would sit below the waterline. Submerged foliage can decay and cloud the water. Keep foliage above the line if it helps the design and is in good condition. If the stems are tied as a hand-tied bouquet, photograph it before you undo the tie. That gives you a reference if you decide the florist’s original shape suited the vase after all.
Choose one or two stems to establish the arrangement’s tallest useful point. Hold them against the outside of the vase and decide where their flowers should sit. Make a modest fresh cut with clean, sharp tools, then place them in water. You can shorten a stem further; you cannot put its length back.
Cut the other stems in small stages rather than lining them all up and making one identical cut. Natural variation creates depth. A single height often makes every bloom compete in one dense band. Keep shorter flowers near the vase opening, medium stems around the center and a few taller accents above them, as suits your chosen shape.
A slightly angled cut can be convenient, but there is no need to perfect the angle. Avoid crushing stem ends with blunt scissors, and put cut stems into water promptly. Check that shorter stems still reach the water after you place them. An attractive flower sitting just above the waterline will not stay fresh because the longer stems beside it can drink.
Place a few greenery or branching stems first if you have them. Let one point a little to the left, another to the right and perhaps one rise above the others. Their crossing stems form a loose support inside the vase. Keep the framework airy: a vase packed with foliage leaves little room for flowers and can look heavier than you intended.
You can also begin with your tallest focal stems if your flowers contain little greenery. The purpose is the same: establish an overall width and height before filling the middle. Turn the vase a quarter turn and see whether the framework still looks stable. For a display against a wall, most detail may face forward; for a table centerpiece, distribute the outline around the vase.
Try the simple “three points” view: one high point, one side-reaching point and one lower point near the rim. These points do not need to form a literal triangle, but they give your eye places to travel. A rounded design can use a gentler version with its widest point near the vase opening and a soft curve above.
Add the most noticeable bloom slightly off center and face it toward the main viewing angle. Put another at a different height and distance from the middle. Avoid lining all focal flowers in a straight horizontal row, which can flatten the design. Each should have enough room for its shape to be seen.
Work one stem at a time. After every two or three additions, take a step back. Ask what you notice first, whether one side seems unusually heavy and whether the flowers are still supported by the vase. If a bloom leans into another, rotate its stem gently or move it to a more open position. Do not force it against the rim.
A useful beginner pattern is one focal bloom near the front, one somewhat higher and farther back, and a third to one side. This gives depth without demanding symmetry. With a one-sided arrangement, make the front intentional. With an all-around vase, rotate it and repeat the idea from another angle.
Supporting flowers connect the larger blooms without hiding them. Place a smaller cluster between two focal flowers, then check whether another gap actually needs a stem. Let some space remain. Empty space shows the outline of petals and foliage and helps a vase flower arrangement feel deliberate.
Use delicate filler sparingly, especially near broad flower faces. A light stem can soften an edge or lead the eye toward a focal bloom. Too much filler creates a uniform cloud and can conceal the flowers you meant to feature. If one side feels bare, first rotate an existing stem or change its angle; a new stem is only one solution.
For colour, group related shades loosely rather than distributing every colour at perfectly equal intervals. Two peach flowers near one another can create a warm area, balanced by a single peach accent across the vase. If you have strong contrasting colours, let one dominate and use the other as an accent. These are design options, not mandatory formulas; the recipient’s taste and the room should guide you.
Set the vase down where it will be displayed and look from the usual viewing distance. A flower arrangement in vase setting can look very different on a worktop and on its final table. Check the overall silhouette, the spaces between blooms, and whether the visual weight sits safely over the base. If tall flowers pull the design to one side, shorten or move them before the vase becomes unstable.
For an all-around arrangement, rotate the vase slowly. Is there a large unintentional hole at the back? Do flowers collide from the side? Make small adjustments. A few asymmetrical elements can look lively; imbalance becomes a problem when the arrangement looks accidental or threatens to tip.
Use the visual guide below as a quick final check:
Front view: Can you see the main blooms clearly, with variation in height?
Side view: Do the flowers have depth, rather than forming a flat wall?
Top view: Are the stems distributed without crushing each other at the opening?
Waterline view: Does every cut stem reach clean water, with no submerged leaves?
Room view: Does the scale fit its table, desk or entryway?
Take a photograph at eye level if you want to see the shape more objectively. A camera frame often reveals a protruding stem or dense patch that was easy to miss up close. Stop once the design feels coherent; endless adjustments can bruise petals and turn a relaxed arrangement into a stiff one.
Use a stable low or medium vase and keep most blooms below seated eye level. Start with a modest spread of greenery, place focal flowers around the middle at varied heights and add smaller flowers where they can be seen from different seats. Test it by sitting down across from another person. If you cannot see their face, shorten the tallest stems or move the arrangement elsewhere during the meal.
Make a gentle dome with slightly taller flowers at the center and progressively shorter stems near the edges. Rotate as you work so one side does not become fuller than the rest. Rounded does not mean every flower must be identical or at the same level. Varied petal shapes and a few stems that extend just outside the curve keep it interesting.
Let one branch or airy stem extend farther on one side, then balance it with a lower cluster of focal flowers on the other. Keep the vase heavy enough to support the lean. This shape benefits from visible space and carefully chosen accents. It is often easier to achieve with a few expressive stems than with a large bunch pushed into a narrow neck.
For more format ideas, see Kinza Flowers’ guide to flower arrangement styles. Choose a shape that suits the stems you have rather than making every variety imitate the same photograph.
Display fresh flowers in a comfortable indoor location away from direct sunlight, heat and a strong air-conditioning vent. In Dubai, a vase near a sunny window may warm even when the room feels cool. Check the water level daily and top it up when necessary; stems at different heights still need to reach it.
Change cloudy water and clean the vase if a film develops. Remove dropped leaves from the water and take out spent blooms as they appear. If you need to recut stems during a water change, hold the composition gently so it is easier to rebuild. Some flowers will open or fade before others, so let the arrangement evolve. Moving one healthy bloom into a smaller vase can extend your enjoyment of what remains.
The precise routine can vary by variety and by how the flowers were prepared. Follow any florist instructions supplied with your bouquet. Our Flower Care page covers general care, while our post-delivery bouquet guide focuses on the first hours after receiving flowers.
If the flowers look crowded, remove one or two supporting stems and check the silhouette again. If everything leans outward, the opening may be too wide for the number of stems; try a narrower vessel or cross the stems to support each other. If the arrangement looks flat, bring one focal bloom slightly forward and put another a little higher or farther back.
If the design seems lopsided, check from the final viewing position before making it perfectly symmetrical. An entryway arrangement against a wall can be fuller at the front. A centerpiece needs attention from several sides. If a flower wilts unusually quickly, check whether its stem reaches the water, make a fresh cut with a clean tool and assess the room conditions. If it is spent, remove it rather than hiding it behind healthy flowers.
If you have more stems than the vase comfortably holds, make a companion arrangement in a smaller vessel. A single bloom beside the main vase can look intentional and makes use of a beautiful stem that would otherwise be crushed. This is also a good way to learn how different flower shapes read at close range.
Choose a clean, stable vase that suits the stems and where the arrangement will sit.
Sort flowers into focal, supporting and greenery roles before making any major cuts.
Trim gradually, remove submerged leaves and make sure every stem reaches fresh water.
Build an outline, add focal flowers at different heights, then fill selected gaps.
Check the vase from its real viewing angles and maintain the water as flowers open.
No. For a straightforward home vase, crossing stems and a suitable vase opening provide support. Floral foam is used in some other arrangement formats, but it is not necessary for this tutorial. Start with a clean vessel and work with the natural shapes of the stems.
There is no universal stem count. It depends on the vase opening, the size of each bloom and the design you want. Begin with fewer stems, place the focal flowers and add supporting material only where it improves the shape. A second vase is better than crushing the extras into a crowded first one.
Usually not for a mixed arrangement. Different heights add depth and help each flower be seen. Decide the overall height first, then trim each stem gradually according to its role. Whatever its length, confirm that its cut end reaches the water.
For a loose arrangement, start with a small greenery framework or a few structural stems, then add focal blooms and supporting flowers. If the bunch has no greenery, begin with the stems that establish height and width. The purpose is to create a shape before filling gaps.
Use a stable vase with enough weight and an opening that supports your stem count. Distribute longer stems across the vessel, check the design from multiple angles and shorten a heavy stem if needed. Move the vase carefully once it is filled; water and a top-heavy arrangement can shift together.
Yes, if it is a wrapped, hand-tied bouquet designed for a vase. Photograph the original shape first, remove transport wrapping as instructed, and trim stems gradually. A basket, floral bag or other constructed arrangement may use a different water source; follow its own care directions instead of dismantling it.
Kinza Flowers creates fresh arrangements for gifting and everyday spaces in Dubai. Browse our Shop, learn more About Us, read Flower Care guidance, or Contact Us for help choosing stems and a design that suits your space.


Subscribe to our newsletter

